26.2.10

How to Avoid Pest Infestation at Home

CDC Increases Awareness To Health Risks Associated With Exotic Pets
During the rainy season, especially after days of continuous downpour, ants are visible inside the house turning up even in the most unlikely places such as atop the washbowl or under your water jug spout. This is quite odd since we know ants hate water. However, if it is wet and soggy outdoors, so the pests must forage for food indoors where it is warm and dry.

Following are measures to control infestation of household pests such as ants, cockroaches, bedbugs, and silverfish.

Full Article: How to Avoid Pest Infestation at Home

23.2.10

How to Replace a Broken Tile


Sometimes a tile cracks and gets chipped off from our bathroom wall, kitchen sink, or floor. Before anyone gets hurt by this cut tile, better repair it immediately. Here's how:


Full Article: How to Replace a Broken Tile

20.2.10

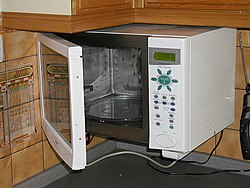
Tips on Cleaning The Microwave with Ease


The microwave is probably the most used appliance in the kitchen. This means there are lots of spills and splatters left by food baked or heated inside. It would be good to know how to clean it easily. Here are some tips.


Full Article: Tips on Cleaning The Microwave with Ease

16.2.10

How to Make a Unique Dinosaur Mask for Kids

A Do-It-Yourself dinosaur mask you can make for your kids for Halloween or a play.

Let me share tips on making a triceratops mask. We made this for my son during a school’s book fair parade in 2008. It won the award of “Best Mask” for that event. I hope you’d find this useful, too.

Materials needed:

  • Box board
  • Canvass cloth
  • Rubber cement
  • White glue
  • Water
  • Facial tissues
  • String
  • Alligator clips
  • 1-inch size paintbrush
  • Foam
  • Soldering iron
  • Old baseball cap
  • Scissors
  • Paints (yellow and green)
  • Plastic bottle

Cut a piece of box board in the shape a dinosaur head. Draw the parts of the face and make holes for the eyes.

Cut a piece of cheesecloth or canvass with the same shape as the dinosaur head.

Glue the cloth and the cardboard together. We used rubber cement for this.

When it has dried up, cut out the excess cloth.

Use clips and a string to hold it at the back to form it into a rounded shape just below the cheeks of the dinosaur face.

Mix 1 part glue and 2 parts water in a bowl to make a thin glue mixture.
Lay a layer facial tissues on the front part of the mask then brush glue mixture on it lightly, just enough to make it cling to the mask base. You will notice small wrinkles will form. Do this until the tissue paper covers the whole mask. Make a ring using tissue paper moistened with glue mixture and form as the base of the horn. Make two layers, then let it dry.

Repeat the process for another two more layers of tissue. Let it dry.

While waiting for the tissue papers to dry, cut out some foam pieces to form into horns.

Use a heated soldering iron side to round the edges of the horn. Use this to put line details, too. It will give a crude and natural texture.

Place another layer of tissue then brush with glue on the mask.

While the tissue is still wet, get a tin bottle cap. Deform it slightly and press it on the mask repeatedly until you get a reptile skin pattern. Let it dry.

Paint it using canned spray paints of green. brown, and yellow or any color you wish, until you achieve the desired color you want.

Paint the horns with a single light coat of yellow or light brown, too.

Once the paint has dried, glue the horns to the mask using rubber cement. Cut out small triangles to resemble the crown of the dinosaur. Make shades using a pencil to add dimension.

Cut out a piece at the bottom of a plastic soda bottle and place them as eye covers.

Get a baseball cap and remove the shade part. Attach this at the back of the mask. Measure it well to the wearer’s head so that his eyes can still peek through the mask’s eye holes.

Now the dinosaur mask is complete.

Protected by Copyscape Duplicate Content Detection Software

15.2.10

How to Care for Your China Ware

To ensure that your precious china will always look as beautiful as the day you received or bought it, here are some helpful tips.
Although a dishwasher is a great time saver, when it comes to your fine china, you’re better off taking time to wash and dry by hand. The heat from the drying cycle can damage it. Save the dishwasher for your everyday dishes.

Full Article: How to Care for Your China Ware
flickr image by Carolina Gonzales

14.2.10

Basic Tips on Buffet Table Arrangement


For intimate gatherings and parties, nothing is easier or more enjoyable than a buffet. Here’s how to set up one like a pro.


Full Article: Basic Tips on Buffet Table Arrangement

13.2.10

Surprisingly Easy Tips for Carpet Care and Maintenance


If you want your carpet to stay beautiful and fluffy, vacuum it at least twice a week. Wipe up spills immediately, and get it deep cleaned every 12-18 months. Here are more tips to keep it in tip top shape for the regular days.


Full Article: Surprisingly Easy Tips for Carpet Care and Maintenance

12.2.10

Laundry Tips for Washing Woolen Blankets


Many blankets can be machine washed and machine dried—even the woolen ones. But they differ in the temperature and cycle settings depending on the kind of fabric and its construction. Others may require dry cleaning.

Full Article: Laundry Tips for Washing Woolen Blankets

11.2.10

Tips for Storing Herbs and Spices


Among nature’s first convenience foods are dried herbs. You can simply pick them from your garden when the leaves are mature, hang them carefully to dry, and cook with the dried herbs all winter, until the fresh ones return in the spring.

Full Article: Tips for Storing Herbs and Spices

10.2.10

Vinegar: An Amazing Kitchen Cleaning Agent


Vinegar is perhaps one of the most widely used solutions for cleaning. Apart from cooking, there are a multitude of uses for the ever reliable vinegar. Because vinegar is acidic, it is good for cleaning water stains and lime deposits. It is also a good rinsing agent because it dissolves soap scum.


  • Clean copper pots by scrubbing it with a pinch of salt mixed with vinegar.
  • Clean grout stains and mildew by applying a straight solution of vinegar and wiping it clean afterwards.
  • To sanitize your wood or plastic cutting boards, spray a mist of vinegar over the surface.  Follow it up with a mist of hydrogen peroxide.  This combination not only cleans but also kills bacteria on meat or produce without harming the food.

Read more: Vinegar: An Amazing Kitchen Cleaning Agent

Vinegar: Over 400 Various, Versatile, and Very Good Uses You've Probably Never Thought OfSixty Uses Of Vinegar"Vinegar for Cleaning" - 21 Easy Ways to Clean with White Distilled Vinegar 

9.2.10

Emergency Carpet Cleaning Tips

Spots and stains on a carpet need to be dealt with immediately. The longer it remains on the carpet, the less likely it is to be removed. Begin by removing the stain-causing substance as soon as possible. Use spatula, paper cup, cardboard or a plastic card to remove thick “gloppy” stuff. For liquids, use paper towels or a clean white cloth. If it’s a dry mess, just vacuum it up.

Full Article: Emergency Carpet Cleaning Tips

7.2.10

Preparation Guide For Home Painting Projects


Before you brush, roll, or spray a drop of paint, there are a few other preparations that are necessary to ensure a good job with minimal effort, errors, and spattering. The precautions may seem obvious, but they are often overlooked.


Full Article: Preparation Guide For Home Painting Projects

4.2.10

How to Paint Cabinets

Tired of how your cabinet looks like? Don’t throw that away yet. You can do a project that can turn it into a brand-new looking one. It’s just a matter of repainting it. If repainting a big one looks daunting, you may start with a small cabinet.

Materials

  • 150-grit sandpaper
  • cloth
  • detergent
  • high-gloss enamel paint
  • latex wood patch
  • liquid deglosser
  • pad sander
  • paintbrushes (3-inch straight, 2-inch trim, and tapered sash)
  • paint remover
  • primer
  • putty knife
  • screwdriver
  • short-nap paint roller
  • sponge
  • tack rag

Instructions


First step is to empty the cabinets and remove any shelves. Take off the doors and remove the hardware. If the hardware is painted, you can remove the old paint by soaking the hardware in paint remover.
Wash the cabinets with a mild detergent. Rinse with clean water and a sponge, then scrape away any loose paint with a putty knife. Use the putty knife and wood patch to fill any scratches, dents, or cracks. Let the wood patch dry.
Sand the cabinet surfaces with a pad sander and 150- grit sandpaper. Wipe away the sanding dust with a tack rag and spot-primer the patched areas and any bare spots with primer. If the cabinets are varnished, sand the surfaces, apply a liquid deglosser, then apply a primer before painting.
  1. To ensure an even finish, you’ll need to paint the surfaces of the cabinets in a specific order:  Paint the back wall first, then the top, next do the sides, and finally the bottom.  (Most cabinets require two coats of paint; sand all the surfaces in all steps lightly between coats with 150-grit sandpaper).
  2. Use a short-nap roller to paint the outside surfaces.  Working from the to down, apply the paint in smooth, even passes.
  3. Paint both sides of cabinet doors to prevent warping.  Using a trim brush, paint one side of the doors at a time, beginning with the inner surfaces.  Paint the raised panels first, then the horizontal rails, and finally the vertical stiles.  When the paint has dried, use the same technique to paint the other side of the doors, then paint the edges.
Finally, paint drawer fronts using a tapered sash brush.  Let the doors and drawers dry for several days.  Install hardware and hang the doors.

Protected by Copyscape Plagiarism Software


How to Organize Your Attic

The attic is usually the least convenient of the storage rooms. You may have a sloped roof and pull-down stairs to deal with. It’s best for items you access only a few times per year or even less often, such as holiday decorations, or toys and furniture you’re saving for your next baby or grandchild.

Full Article:
Tips on Organizing Your Attic

3.2.10

How to Decant Paint From Aerosol Spray Can Paint


Here's a simple and clean way of drawing out paint from your favorite paint spray can for use as touch up or hand brushing your scale model kits.

Materials needed:

1. Spray can paint

2. Bendy straw

3. Blu-tac

4. Vial or container with cover to hold the paint


Full article: How to Decant Paint From Aerosol Spray Can Paint


1.2.10

Practical Tips and Storage Ideas for The Bathroom


A few small changes that will unclutter your bath can turn this functional room in your house into an inviting retreat.

Put up shelves for extra storage. You can customize them to fit your needs.


A three-tiered plate rack can be used as a nice holder for soaps, combs, and all other knick knacks.


A bath-side soap holder adds charm to an old fashioned tub, and it will certainly come in handy.


Full Article: Practical Tips and Storage Ideas for The Bathroom